Feeds:
Posts
Comments

Archive for the ‘Vegan’ Category

You could probably make this dish in the time it takes to read this recipe.  It depends, of course, on good olives, which don’t come out of a jar or a can.  Ideally, you use green olives stuffed with garlic; this saves you the work of pitting them (although it’s probably a good idea to roughly chop the olives first to make sure no errant pits make their way into the food processor).  If you can’t find garlic-stuffed olives, use an equivalent amount of (pitted) green olives and throw one peeled clove of garlic into the mix.

This pesto is great tossed with chopped tomatoes for a quick salad.  It would also make a great pasta sauce, sandwich spread or dip for crudites.

makes about 3 cups of pesto

  • 1 c of green olives stuffed with garlic (Actually, by “1 c” I mean a few handfuls.  I have no idea how many olives actually made it into this pesto.  Ditto for the almonds.  If it’s too olive-y, add more almonds.  If it’s too almond-y, more olives.  Rocket science, this ain’t.)
  • 1 c of blanched, slivered almonds
  • pinch of red pepper flakes
  • olive oil as needed (about 1 c)

Double-check to make sure there are no pits in the olives, then put in the food processor along with the almonds, red pepper and a few grinds of black pepper.  Pulse a few times to roughly chop the olives and almonds, scraping down as needed.  Put the food processor on low and drizzle in the oil with the machine running.  Add enough oil to reach the desired consistency (I like this on the looser side).  Serve and enjoy.

Read Full Post »

OK, truth be told, this is probably more accurately described as “vegetable soup with some beets thrown in”.  It doesn’t have that full-blown, beet-topia experience that one gets at Veselka.  It’s still pretty tasty, and when it’s 30 degrees and sleeting, it’s a nice thing to warm up to.

serves 4

  • 3 medium golden beets, scrubbed and trimmed, with the greens separated, washed thoroughly and reserved
  • about 4 c of Vegetable Stock
  • 1 clove of garlic, peeled
  • 1 large carrot, peeled
  • 1 medium onion, peeled
  • 1 large celery stalk, washed and trimmed
  • 2 c crimini mushrooms, washed

Preheat the oven to 400 degrees.  Cut the beets in half, place in a baking dish and cover; roast in the oven until tender, about 1 hour.  Meanwhile, prepare the Vegetable Stock.

When the beets are done, remove them from the oven to cool (keep them covered, though, so that the skin comes off easily).  In a medium-sized pot, heat a few tablespoons of olive oil over medium heat.  Add the garlic clove.  Roughly chop the carrots, onion and celery and add with several pinches of salt to the garlic.  Saute, stirring occasionally, until the vegetables are tender and brown in spots, about 10 minutes. Slice the mushrooms into 1/2-inch thick slices and add to the vegetables.  Saute until tender, another 10 minutes.

Peel the beets and roughly chop.  Add the cooked beets to the other vegetables; stir to incorporate.  Stir in the Vegetable Stock and reduce heat to a simmer.  Cook until the soup comes together (you’ll know it when you see it), about 20 minutes.  Serve piping hot with a dollop of sour cream and a sprinkling of chives.

Read Full Post »

There are some things about the West Coast that I don’t think I’ll ever get used to (to which I’ll never get used??).  For example, the other day, one of my students saw what I was eating for lunch and said, “Oooh!  Quinoa tabbouleh!”

Now, when I was 15, I didn’t know of the existence of either quinoa or tabbouleh.  If I had known of their existence, I would have reserved such knowledge strictly for use in games of Scrabble.  I certainly never would have imagined eating either of those two things, let alone wanting to.

Clearly, I’m older now.  It’s doubtful that I’m any wiser, but I at least have the good sense to enjoy quinoa tabbouleh.  Still, there’s part of me that’s a little disconcerted that any red-blooded American teenager would look upon a whole-grain salad as a cause for culinary excitement.  Imagine my consternation, then, when a SECOND 15-year-old student saw my lunch the next day and said, “Ooh!  Quinoa tabbouleh!”  (In fact, I had been eating quinoa with bok choy and tofu, but that’s neither here nor there.)  One quinoa-lovin’ teenager is a freakish aberration; two quinoa-lovin’ teenagers is a Militant Carnivore’s version of the Twilight Zone.

makes enough tabbouleh to feed a bunch of quinoa-lovin’ teenagers

  • 2 cups uncooked quinoa
  • 1 bay leaf
  • 4 large shallots (there should be about 4 c sliced)
  • 2 bunches of green onions
  • 1 pint of grape tomatoes
  • 2 bunches of parsley
  • 1 handful of mint
  • 1 1/2 c of mixed black and green olives (I like to include Kalamata olives as well as garlic-stuffed green olives)
  • juice of 6 lemons
  • red pepper flakes, to taste

Rinse the quinoa thoroughly under cold running water:  Quinoa is coated with saponin, most of which is removed in processing, but it’s good to rinse it well before cooking to remove any traces.  Otherwise, you’ll end up with soapy tasting quinoa.  Put the quinoa, bay leaf and a healthy pinch of salt in a medium-sized pot and cover with water by an inch; cover and place over high heat.  When the water comes to a boil, reduce to a simmer.  Cook until the quinoa has absorbed most of the water and a spiral appears in each grain of quinoa, about 20 minutes; the quinoa should be tender.  Drain the quinoa thoroughly and discard the bay leaf. Put the quinoa in the largest mixing bowl that you have.

The key to this or any tabbouleh is to season it with reckless abandon:  Add more lemon, pepper and red pepper than you think prudent.  Also, there should be at least as much non-grain stuff (onions, herbs, olives, tomatoes) as grain.  The olives, by the way, are the innovation of my Lovely Vegetarian Wife’s aunt.  A master stroke:  Once you try it, you’ll wonder why you ever ate tabbouleh without them.

Peel the shallots and slice as thinly as possible (I use a mandoline).  Put the shallots in a medium-sized mixing bowl, toss with several pinches of salt and set aside.

Wash and trim the green onions; chop into 1/2-inch pieces.  Add to the quinoa.  Wash the tomatoes and cut in half (or quarters or slices—knock yourself out); add to the quinoa and green onions.

Wash and dry the parsley and mint thoroughly.  Remove and discard the stems.  Chop the herbs rather finely (but don’t kill yourself), then add to the quinoa mixture.

Using the flat side of a chef’s knife, flatten the olives with pits.  Remove and discard the pits, then chop the olives roughly.  Add to the quinoa mixture.  Slice up the garlic-stuffed olives, then roughly chop.  Add to the quinoa mixture.  Add the sliced shallots to the quinoa mixture.

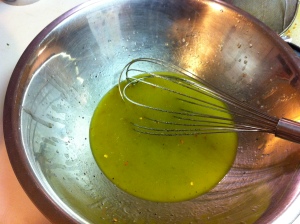
Put the lemon juice into a medium-sized mixing bowl.  Slowly drizzle in the olive oil, whisking constantly, until a creamy salad dressing is formed (you’ll need at least a half cup).  Add a judicious amount of salt (remember:  there are pre-salted shallots in this tabbouleh, as well as olives), lots of freshly ground black pepper and the red pepper flakes.

Toss the tabbouleh with the dressing.  You can eat it immediately, or let it ruminate for a while.  I like to make a huge batch on Sunday and eat it for lunch all week, much to the excitement of my students.

Read Full Post »

Chili

I used to take it as dogma that chili, real chili, must contain beef—cubes of beef, not ground beef—and only beef:  no beans, no chicken, no nuthin’.  The very idea of vegetarian chili was ludicrous (and don’t get me started on that Cincinnati stuff that they serve on spaghetti).  Indeed, this is the kind of chili that’s prepared on the competitive chili circuit.  This, I believed, was the authentic chili.

But then I got to thinking:  One, I really needed to lighten up.  Two, a combination of beef and beans (or chicken and beans, or beans by themselves) in a tomato-y spicy broth is a fantastic meal, whatever it’s called.  Three, I happen to write a blog called The Militant Carnivore Cooks for his Vegetarian Wife, so I should probably be open to the idea of less meat-centric chilis.

The final straw was an article in a recent Cook’s Illustrated that discussed that “authentic” chili that is prepared on the competitive chili circuit.  In addition to being bean-free, that chili may not contain any visible traces of tomato or onion.  It consists of nothing more than beef and heaps and heaps of ground spice, added in layer after layer over several hours of stewing.

Eew.

So, I’m a convert.  I’m a born-again chili-head.  Beef, beans, chicken, turkey, mushrooms—whatever you want to use in your chili is fine by me.  (Well, OK, I draw the line at TVP.  Again, eew.)  The only ingredient that should be common to all chilis, in my opinion, is some form of chile.  (Call me crazy.)

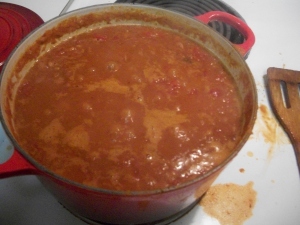
So it was that I decided to turn a batch of pinto beans into an all-bean, vegan chili.  The recipe is very similar to the Soupy Lentils from last week, but the spices give it a very different flavor profile.  I was out of dried chiles and couldn’t find chipotles en adobo at the supermarket, so I turned to the one smoked chile that I always have on hand:  pimenton.  It worked like a charm.  I couldn’t decide how to cut the onions for the chili (did I want big chunks?  thin slices?); being lazy, I went for the path of least possible work and tossed the onion in the food processor and pulsed it into a coarse puree.  A fortuitous and felicitous phenomenon resulted:  The tiny pieces of onion in the finished chili gave it a coarse texture that resembled that of ground beef.  Voila!  Vegan chili with beefy, hearty texture, and no TVP in sight.

  • 1 large onion, peeled, cut into rough 2-inch chunks
  • 2 cloves of garlic, peeled
  • 1 t cumin seeds
  • 1 T dried Mexican oregano
  • 2 T pimenton (Spanish smoked paprika)
  • 1 28-oz. can of tomatoes
  • 1 12-0z. can of PBR (or another appropriately cheap and hipster-worthy beer)
  • 4 c cooked or canned pinto beans

Heat a few tablespoons of olive oil in a large Dutch oven over medium-low heat.  Toss the onion and garlic into the food processor.   Keeping your face well back, pulse until the onion is coarsely pureed.  Add to the Dutch oven with a generous pinch of salt and saute over medium heat until soft and translucent, about 3-4 minutes. Meanwhile, pound the cumin seeds and oregano in a mortar and pestle until roughly ground; add to the onion mixture along with the pimenton and cook for about 2 minutes.

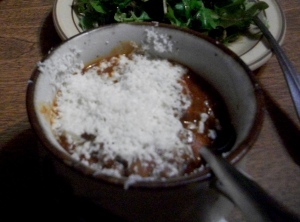
Drain the liquid from the can of tomatoes into a bowl; reserve.  Using scisscors, roughly chop the tomatoes inside the can, then stir into the onion mixture.  Turn the heat up to medium and cook, stirring frequently, for about 5 minutes.  Add the tomato juice and beer, stirring and scraping the bottom of the pan to deglaze, and cook, stirring occasionally, for about 5 minutes or until most of the alcohol has evaporated off.  Stir in the beans.  Add water to cover and stir to combine.  Simmer until the mixture comes together, about 10-20 minutes.  Taste for seasoning and spice; if desired, add a few dashes of hot sauce or cayenne pepper.  Serve with grated cotija or Monterey Jack and/or a dollop of sour cream and any other garnishes you wish (particularly chopped green onions).  Definitely add some cornbread on the side.

Read Full Post »

Soupy Lentils

This was supposed to be lentil soup, but the bast laid plans of mice and Militant Carnivores…

That’s OK, though:  I think I like lentils this way even better.

First, cook your lentils.  Actually, first buy your lentils:  French green lentils (lentilles du Puy) are what you want here, and for all other lentil applications.  They hold their shape well and seem less dingy and sludgy when cooked then traditional brown lentils.  Next, sort through the lentils to make sure there are no stones or clods of dirt hiding in there.  So now you have:

  • 2 c dried lentilles du Puy
  • 1 garlic clove, peeled
  • 1 bay leaf

Dump everything in a  pot and cover with water by an inch.  Place over high heat and bring to a boil.  Reduce the heat to a simmer and cook, covered, until tender, about 25 minutes.  Drain the lentils, reserving cooking liquid, and discard garlic and bay leaf.  You could eat the lentils at this point (with a little salt), but just wait.  You’ll want to eat these soupy lentils all winter long.

  • 2 medium carrots, peeled, trimmed, roughly chopped
  • 2 medium celery stalks, trimmed, roughly chopped
  • 1 large onion, peeled, roughly chopped
  • 1 garlic clove, peeled and smashed
  • 1 bay leaf
  • 1 large can (28 oz.) of tomatoes (Whole tomatoes, please.  I always buy whole tomatoes.  Diced tomatoes are treated with calcium chloride or some such chemical that keeps them from ever fully breaking down in a sauce, and tomato puree tastes precooked.  Stick with the whole tomatoes.  I don’t care if you use chi chi San Marzano tomatoes flown all the way from Italy or if you use Costco brand tomatoes.  Whole tomatoes are the way to go.)
  • cooked lentils from recipe above (this probably yields about 6 c of cooked lentils)
  • 1 c of reserved lentil cooking liquid (see above)
  • 1 big handful of parsley, thoroughly washed

One of my New Year’s resolutions is to use mirepoix more often.  Mirepoix is a traditional French combination of carrots, celery and onion that is sauteed as the foundation for a soup, sauce, stew or other recipe.  (I know, I know:  I have weird New Year’s resolutions.)   In the past, I rarely used carrots and celery in my cooking, but now I understand that they function the way that bitters and sugar function in a cocktail:  The carrots, like the sugar, add sweetness while the celery (and the bitters) provides bitterness, thus ramping up the amplitude of a dish (or a cocktail) and creating a fuller flavor profile.  So, mirepoix it is:

Heat a few tablespoons of olive oil in a large Dutch oven on the stovetop over medium heat.  Add the carrots, celery, onions, garlic, bay leaf and a generous pinch of salt.  Saute, stirring frequently, until the vegetables are soft and caramelized, about 20 minutes.

Add the *liquid* from the can of tomatoes to the pot.  Stir into the vegetables with a wooden spoon, scraping the bottom of the pot to deglaze.  Stick a pair of kitchen shears into the tomato can and cut up the tomatoes (this is much faster and neater than trying to chop them on a board).  Add the chopped tomatoes to the pot and stir to combine.  Cook until the tomatoes break down and become integrated with the other vegetables, about 10 minutes.

Add the cooked lentils and a few generous pinches of salt; stir to combine.  Add the lentil cooking liquid and about 3 c water (or stock, if you have it) to cover.  Turn heat to high and bring to a boil.  Add salt and pepper to taste.  When the liquid boils, reduce to a simmer and cook until the mixture comes together, about 10-15 minutes.  (You’ll know it when you see it.)

There you have it:  soupy lentils.  Ladle into bowls.  Roughly chop the parsley and scatter over top.  Drizzle with the best extra virgin olive oil that you have and sprinkle some flaky sea salt on top.  Serve with bread (or even better, bruschetta) on the side.

Read Full Post »

If I accomplish nothing else through this blog than encouraging a few people to try persimmons, then I will have done my small part to make the world a better place.

Persimmons have a lot going for them:  They’re photogenically attractive fruits; they offer a bright note of summery, almost citrusy sweetness in a mellow, autumnal package; they’re portable, durable and easy to eat (no messy rind to peel off, no seeds to spit out).  Since I’m obsessed with savory salads based around fruit, the discovery of persimmons and pomegranates at a recently opened nearby produce market inspired me to create this salad for a crisp October day.

I think one thing that may discourage people from buying persimmons, though, is the existence of two distinct and very different types of persimmons:  Fuyu, which can be eaten when they’re as hard as an apple (as the sticker attached to my persimmons told me), and Hichaya, which are painfully astringent at any point of ripeness shy of custardy-soft.  (This article from NPR nicely expounds on the virtues of these two fruits.)

Use Fuyus for this salad.  If you have a mandoline, you can make quick work of both the persimmons and the fennel.  The pomegranates add enough tartness to the salad that vinegar or lemon juice is unnecessary:  Just drizzle with the best extra virgin olive oil that you have and sprinkle with flaky sea salt and freshly ground pepper.

  • 4 Fuyu persimmons
  • 2 bulbs of fennel
  • 1 pomegranate
  • olive oil

Wash the persimmons; trim off and discard their ends.  Using a mandoline (or your kung fu knife skills), slice the persimmons to a 1/8-inch thickness and add to a large mixing bowl.

Wash the fennel.  Using scissors, snip off some of the fennel fronds (say, 1/4 c worth); set aside.  Cut off the stalks and reserve for the vegetable stock bag.   Trim off and discard the root end of the fennel.  Slice the fennel bulb crosswise into 1/8-inch thick slices.  Add to the persimmon slices.

Using a chef’s knife, cut the pomegranate in half.  Working over a separate mixing bowl, remove the red seeds from the yellow pith; add the seeds to the bowl and discard the pith (and any gray or rotten-looking seeds).  Add the pomegranate seeds to the persimmon and fennel.

Roughly chop the reserved fennel fronds.  Add to the persimmon, fennel and pomegranate.  Drizzle generously with olive oil and add a healthy amount of salt and pepper.  Toss to combine.  Serve.

Read Full Post »

A great picnic salad, especially pretty if you use red quinoa.  Now that asparagus season has passed, you could try this with green beans or zucchini instead.  Go ahead and toss in a little chèvre, if you’re so inclined.

makes enough quinoa salad for 2 or 3 picnics, or for a week of light lunches, mid-afternoon grazing and midnight snacks

  • 1 c red quinoa, thoroughly rinsed (quinoa must be rinsed to remove its coating of saponin, which is not something you want to eat)
  • 1 bunch pencil-thin asparagus, washed, ends trimmed (and reserved for vegetable stock)
  • 2 cloves of garlic, peeled
  • 1/2 t coriander seeds
  • 1 T Dijon mustard
  • 1 orange
  • olive oil, as needed (at least 1/2 c)
  • 2 handfuls of pecans

Preheat the oven to 350 degrees.

If you have a large pot with a steamer that sits at the top, then you can cook the quinoa and the asparagus in the same pot:  Fill the pot halfway with water, making sure that it doesn’t come up to the level of the steamer.   Put the pot over high heat and bring to a boil.  Stir in a large pinch of salt and the quinoa; reduce the heat to medium-low so that the quinoa cooks at a gentle simmer.

Put the steamer basket over the simmering water and put the asparagus inside.  (If the asparagus is too long, snap it in half.)  Cover the pot and steam the asparagus until bright green and just tender, 3-5 minutes.  (Err on the side of undercooking the asparagus:  It needs some snap to have some textural contrast with the quinoa, and besides, mushy asparagus is yucky.)  Set up an ice bath (a lot of cold water and ice cubes in a large bowl).  When the asparagus is done, immediately transfer it to the ice bath and completely submerge it to stop the cooking.   Let it cool for a few minutes, then drain thoroughly.

Meanwhile, with a mortar and pestle, start mashing up the garlic cloves with a pinch of salt.  Once the cloves are in smaller pieces, add the coriander seeds and mash them into the garlic.  (The garlic will keep the coriander seeds from flying around like miniature BBs.)  Once the garlic and coriander are pureed, stir in the mustard.  Juice the orange and stir the orange juice into the garlic-mustard mixture.  Transfer this to a mixing bowl and slowly whisk in the olive oil until a creamy vinaigrette (well, citronette) is formed.

When the quinoa is done (you should see a well-developed spiral in the middle of each quinoa grain, and most of the water should be absorbed), drain the quinoa in a fine sieve or colander.  Transfer to a large mixing bowl.

Now we’ve got the asparagus, the dressing and the quinoa:  The only thing left is the pecans.  Place them on a rimmed baking sheet, crushing them lightly as you do.  Bake for about 5 minutes, stirring occasionally, just to warm them up; they should start to smell toasty and incredible.  (Be careful, though:  Nuts go from toasted to burnt very quickly, and burning does nothing good for their flavor.)

Chop the asparagus into 2-inch lengths and add to the quinoa.  Add the nuts to the quinoa and stir to combine.  Add enough of the dressing to coat the salad and stir to combine thoroughly.

If you wanted to add some crumbled goat cheese or feta, or perhaps a few chopped herbs (dill?), this would be the time to do it.  Try to refrain from eating the salad immediately:  It definitely benefits from an hour or so in the fridge.  Serve a dozen of your closest friends at a springtime picnic, or enjoy having a ready-made delicious and nutritious meal in the fridge for a week.

Read Full Post »

The trouble with being a pedant is that, one day, your pedantry will come back and bite you in the rear.

After spending a semester in college studying in Italy (well, “studying” might not be the most accurate term), I returned with a little knowledge of Italian and a lot of self-righteousness about the way Americans approach Italian food.  Pasta as a main course?  How ludicrous.  Cappuccino in the afternoon?  Barbaric.  Cheese with seafood?  Puh-leeze.

This condescension extended to the pronunciation of Italian words, especially of America’s favorite appetizer in the ’90s, the ubiquitous bruschetta.  Now, Italian has got one tricky rule of spelling, and it’s not too hard to master:  The letters c and g are always hard (as in the English cat and gate) except when followed by e or i:  Then they sound like the English letters “ch” and “j”.  (Look at the word cappuccino:  The first c is hard as in “cat”, and the second one—well, two—is a “ch” sound.)   In order to keep a hard c or g before e or i, insert the letter “h” after it:  That pasta that you love with meatballs is pronounced spa-get-ee, not spa-jet-ee.  This is how Italian spelling works:  No exceptions.

Thus, it would irritate me to no end when I overheard people ordering “bru-she-ta”, not “bru-sket-ta”.  (What irked me even more—and still perplexes me to this day—is the existence of jarred “bruschetta” topping.  Bruschetta is toast:  You can top it with anything, not just tomatoes and basil.  But I digress.)  I started pronouncing Ghiradelli’s chocolate with a hard g, even though San Franciscans refer to the square whence it comes as gee-ra-del-leez.

But my entire phonological system collapsed when a colleague of mine referred to that bright red cured cherry that you find on top of your sundae as a mar-a-SKEE-no (which is, of course, how the word should be pronounced in Italian).  I had grown up referring to them as mar-a-SHEE-nos, and I suspect you did, too.  Well, if that just wasn’t sunlight to the blind:  I had been brusketta-ing all over the place, and I hadn’t even known it.

What can I do?  I’m left stewing in my own hypocrisy.  I wince when somebody orders brusketta or Geeradelli’s chocolate, but I can’t bring myself to call these delicious little cocktail garnishes “maraskeeno cherries”.  (Oddly enough, I have no problem referring to the bottle of Luxardo maraschino that I finally acquired by its proper Italian pronunciation, but I fear that pronouncing the liqueur one way and the cherries another way is an untenable system.)

Fortunately, this recipe, adapted from NPR’s Kitchen Window, is very easy to follow, even if I can’t pronounce the finished product.

makes a lot of cherries

  • as many cherries as will fit in a Mason jar or plastic container, washed, stems and pits intact
  • enough Luxardo maraschino liqueur to cover the cherries (I used about 1 cup)

Stuff the cherries (any kind will do—I used Bing) into the jar.  Pour in enough liqueur to cover them.  Put the lid on and shake the jar a few times.

Refrigerate the cherries for at least two weeks, shaking them every other day or so.  (They’re even better after a month.)  I’ve noticed that the cherries have turned a fairly dingy brown, but that’s because their color has leached into the liqueur, which has turned a delightful fuchsia (and is a delicious digestivo).  Clearly, those neon-red cherries you remember from your childhood ice cream parlor have more than a little Red No. 5 in them.  These delightfully chewy maraschinos, with their vague redolence of alcohol, are definitely more at home in an Old Fashioned than on a sundae.  It also goes without saying that these cherries are definitely not for children.


Read Full Post »

When late summer rolls around, one can never have enough recipes for corn, tomatoes or zucchini.  This is a nice versatile recipe:  Either make the dish ahead so you can serve it later as a room temperature (or chilled) salad, or serve it warm as a side dish.  While this vegetable medley is phenomenal with produce fresh from the farm, the sauteing and the herbs guarantee that it will be delicious even when made in the middle of winter with lackluster vegetables.

  • a couple of sage leaves, or a sprig of rosemary or thyme
  • 1 clove of garlic, peeled
  • 2 medium zucchini, ends removed, cut into 1/2 inch dice
  • 2 ears of corn, shucked, silk removed
  • 4 Roma tomatoes
  • 1/2 lime
  • 2 avocados

In a large skillet, heat a couple glugs of olive oil over medium heat.  Add the sage leaves and the garlic.  When the oil is hot, add the zucchini and a generous pinch of salt.  Saute over medium heat, stirring occasionally.

Holding the corn upright over a bowl, cut the kernels off the cobs (reserve the cobs for vegetable stock).  When the zucchini starts to brown, add the corn kernels to the skillet.  Saute over medium heat, stirring occasionally, for about 5 more minutes.

Chop the tomatoes into 1/2-inch dice.  Add half of the tomato to the skillet and saute over medium heat until the tomatoes are juicy, about 3-4 minutes.  Squeeze the lime juice into the skillet, stir to combine, and remove from the heat.

Transfer the vegetables to a large mixing bowl.  Add the reserved tomato.  Dice the avocado and add to the bowl.  Mix to combine and check for seasoning, adding salt and pepper to taste.  Serve warm, or refrigerate until later.  (You can also chop and add some fresh herbs to the salad:  basil, tarragon, dill, fennel fronds…)

Read Full Post »

My mother-in-law recently gave me Seven Fires, an encomium to grilling over live fire by the Argentine chef, Francis Mallmann.  Seven Fires passes the crucial test of any cookbook:  It makes me want to cook.  Particularly, this book makes me want to cook an entire cow over a bonfire by a secluded lake in Patagonia, but, barring that, it makes me want to grill anything, anywhere.

So, the recent World Cup match between Argentina and Germany seemed like the perfect pretext for starting a fire at 7:00 AM and testing Mallmann’s infectiously presented philosophy that everything tastes better when grilled.

Since we don’t happen to own a grill (or a TV, for that matter), and since we are already in the habit of exploiting the generosity of our good friends, The Bearded Quaker and Nurse Lanois, we decided to host the game at their place.  They seemed a little taken aback when I showed up at their house the night before for the pre-game slumber party armed with clarified butter, crêpe batter and a dozen sausages, but, good friends that they are, they have learned to roll with my various eccentricities.

I figured that if I could grill panqueques, savory crêpes to be filled with dulce de leche, I could grill anything.  While I was out there, I might as well throw some sausages on the fire; there was no Argentine chorizo to be found, but some German bratwurst seemed like a noble and diplomatic concession to the opponent.  (My Lovely Vegetarian Wife is also of Polish heritage, so some kielbasa had to find its way on to the menu as well.  She would have been bitterly disappointed without it, I am sure.)  To round out this menu, I had been dying to try Mallmann’s recipe for burnt oranges with rosemary, a dish that he strongly urged should only be prepared outside due to the prodigious amounts of smoke it was sure to create.

Cooking, like all crafts, can be an act of self-discovery when it calls upon our resources and ingenuity to their fullest extent.  There were many uncertainties about my plans for an asado para desayuno (including whether my in-laws would disown me for coining absurd Spanish phrases like that):  Would I be able to fire up a grill at 6:30 in the morning?  For that matter, could I even wake up at 6:30 in the morning on a Saturday?  Would I be able to adjust the coals sufficiently under a cast-iron skillet to control its heat?  Could I do this while also grilling sausages?  And would anybody else be awake to make me a cup of coffee??

The answer to all of those questions was “Yes”.  The crêpes cooked almost instantly and got gorgeous crispy edges; the oranges were sweet, jammy, nicely charred and herbal from the rosemary; the sausage was sausage (i.e., the single greatest food known to humanity).

The game, alas, did not go nearly as well as the breakfast.  According to my wife, we have banished this game from our collective memory.  It is not to be spoken of.

We drowned our sorrows with mimosas.

Panqueques con Dulce de Leche

serves a dozen hungry soccer fans

  • 1 1/2 c butter (Don’t worry—you’re not going to eat all of it.)
  • 3 c flour
  • 8 eggs
  • 2 c water
  • 2 c milk

Make the panqueque batter and the clarified butter the night before, or at least 1 hour in advance:  Melt all of the butter in a heavy saucepan over low heat.  Combine 1/2 c of the melted butter, the flour, eggs, water, milk and a hefty pinch of salt in a blender; blend on high speed until thoroughly mixed.  Refrigerate.

Finish clarifying the butter:  Skim off and discard any foam from the top of the butter.  Carefully pour off and reserve the melted butterfat, leaving the milk solids in the bottom of the pan behind.  Discard the milk solids.  Refrigerate the clarified butter; it will solidify in the fridge.  If you want to melt it before using it, simply microwave for about 20 seconds.

Using charcoal (or, even better, hardwood), build a hot fire.  Pile the coals to one side of the grill so that they reach up almost all the way to the grill rack.  Place a flat cast-iron griddle on the grill rack directly over the coals.  Cover the grill and allow the griddle to preheat for about 10 minutes.  (Alternately, simply heat up the griddle indoors over medium-high heat.)  When a drop of water evaporates instantly on the griddle, it is ready.

Stir up the pancake batter in case it has separated.  Put a tablespoon of the clarified butter on the griddle, spreading it around to coat the griddle evenly.  Ladle about 1/4 c of the batter onto the griddle, spreading it around with the ladle to form a thin layer over the whole griddle.   The panqueque will cook very quickly:  When the edges are brown and firm, flip the crêpe.  Cook for about 15 seconds more on the second side until the pancake is cooked through.

Transfer to a plate.  Put a heaping spoonful of dulce de leche on the panqueque and spread it around.  Roll up the pancake like a jelly roll.  Repeat with the remaining panqueques, adding more clarified butter to the griddle before each one.  Serve with…

Naranjas Quemadas con Romero (Burnt Oranges with Rosemary)

  • 6 oranges
  • 1 c sugar
  • 1 sprig of rosemary

Preheat a cast-iron griddle for ten minutes over a hot wood or charcoal fire (or, if you have a stove with a powerful exhaust fan, heat the skillet over high heat).  Meanwhile, peel the oranges and slice them in half through their “equator”.   Place the sugar on a plate.  Strip the rosemary leaves from the sprig and add them to the sugar.  Press the oranges, cut side down, into the sugar.

When the griddle is hot (a drop of water will evaporate instantly), put four of the orange halves, cut side down, onto the griddle.  Add a little more of the rosemary-sugar mixture to the griddle between the oranges.  Cook the oranges over high heat without moving them until the edges brown and start to blacken.  Carefully flip the oranges and cook on the second side for 1-2 minutes more.  Serve along side panqueques con dulce de leche and grilled sausages for brunch, or with a little sweetened yogurt for dessert.

Read Full Post »

Older Posts »