Feeds:
Posts
Comments

Archive for the ‘Side Dishes’ Category

There are some things about the West Coast that I don’t think I’ll ever get used to (to which I’ll never get used??).  For example, the other day, one of my students saw what I was eating for lunch and said, “Oooh!  Quinoa tabbouleh!”

Now, when I was 15, I didn’t know of the existence of either quinoa or tabbouleh.  If I had known of their existence, I would have reserved such knowledge strictly for use in games of Scrabble.  I certainly never would have imagined eating either of those two things, let alone wanting to.

Clearly, I’m older now.  It’s doubtful that I’m any wiser, but I at least have the good sense to enjoy quinoa tabbouleh.  Still, there’s part of me that’s a little disconcerted that any red-blooded American teenager would look upon a whole-grain salad as a cause for culinary excitement.  Imagine my consternation, then, when a SECOND 15-year-old student saw my lunch the next day and said, “Ooh!  Quinoa tabbouleh!”  (In fact, I had been eating quinoa with bok choy and tofu, but that’s neither here nor there.)  One quinoa-lovin’ teenager is a freakish aberration; two quinoa-lovin’ teenagers is a Militant Carnivore’s version of the Twilight Zone.

makes enough tabbouleh to feed a bunch of quinoa-lovin’ teenagers

  • 2 cups uncooked quinoa
  • 1 bay leaf
  • 4 large shallots (there should be about 4 c sliced)
  • 2 bunches of green onions
  • 1 pint of grape tomatoes
  • 2 bunches of parsley
  • 1 handful of mint
  • 1 1/2 c of mixed black and green olives (I like to include Kalamata olives as well as garlic-stuffed green olives)
  • juice of 6 lemons
  • red pepper flakes, to taste

Rinse the quinoa thoroughly under cold running water:  Quinoa is coated with saponin, most of which is removed in processing, but it’s good to rinse it well before cooking to remove any traces.  Otherwise, you’ll end up with soapy tasting quinoa.  Put the quinoa, bay leaf and a healthy pinch of salt in a medium-sized pot and cover with water by an inch; cover and place over high heat.  When the water comes to a boil, reduce to a simmer.  Cook until the quinoa has absorbed most of the water and a spiral appears in each grain of quinoa, about 20 minutes; the quinoa should be tender.  Drain the quinoa thoroughly and discard the bay leaf. Put the quinoa in the largest mixing bowl that you have.

The key to this or any tabbouleh is to season it with reckless abandon:  Add more lemon, pepper and red pepper than you think prudent.  Also, there should be at least as much non-grain stuff (onions, herbs, olives, tomatoes) as grain.  The olives, by the way, are the innovation of my Lovely Vegetarian Wife’s aunt.  A master stroke:  Once you try it, you’ll wonder why you ever ate tabbouleh without them.

Peel the shallots and slice as thinly as possible (I use a mandoline).  Put the shallots in a medium-sized mixing bowl, toss with several pinches of salt and set aside.

Wash and trim the green onions; chop into 1/2-inch pieces.  Add to the quinoa.  Wash the tomatoes and cut in half (or quarters or slices—knock yourself out); add to the quinoa and green onions.

Wash and dry the parsley and mint thoroughly.  Remove and discard the stems.  Chop the herbs rather finely (but don’t kill yourself), then add to the quinoa mixture.

Using the flat side of a chef’s knife, flatten the olives with pits.  Remove and discard the pits, then chop the olives roughly.  Add to the quinoa mixture.  Slice up the garlic-stuffed olives, then roughly chop.  Add to the quinoa mixture.  Add the sliced shallots to the quinoa mixture.

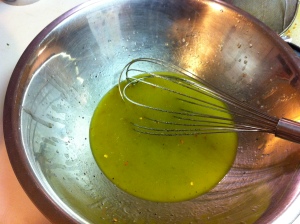
Put the lemon juice into a medium-sized mixing bowl.  Slowly drizzle in the olive oil, whisking constantly, until a creamy salad dressing is formed (you’ll need at least a half cup).  Add a judicious amount of salt (remember:  there are pre-salted shallots in this tabbouleh, as well as olives), lots of freshly ground black pepper and the red pepper flakes.

Toss the tabbouleh with the dressing.  You can eat it immediately, or let it ruminate for a while.  I like to make a huge batch on Sunday and eat it for lunch all week, much to the excitement of my students.

Read Full Post »

Here at The Militant Carnivore Cooks for his Vegetarian Wife, we believe that health-conscious nutrition and irresponsibly wretched excess go hand in hand.  Thus, our scientists at TMCCFHVW Labs have created the Ultimate Multigrain Waffle:  It’s packed full of whole wheat flour, cornmeal and quinoa for all of the self-righteous fiber one could hope for at breakfast.  It also has a cubic s***load of butter thrown into it.  (That “c” that you see after the number “1” down below is not a typo.)

It’s not my fault:  The Joy of Cooking said it was OK.  I quote verbatim from its recipe for Basic Waffles:  “We give you three choices to prepare this recipe:  use 4 tablespoons butter for a reduced-fat waffle, 8 tablespoons for a classic light and fluffy waffle; or 16 tablespoons for the crunchiest most delicious waffle imaginable.”

That’s not really a choice at all, is it?

makes 15-20 waffles

  • 1 c whole wheat flour
  • 1 c cornmeal, preferably stone-ground
  • 1 T baking powder
  • 1/4 c sugar
  • pinch of salt
  • 3 eggs
  • 1 1/2 c milk
  • 1 c butter, melted
  • 2 c cooked quinoa

Mix the first five ingredients (aka, the dry ingredients) together in a large mixing bowl.  In another mixing bowl, mix together the eggs, milk and butter.  Pour the wet ingredients over the dry ingredients and stir with a wooden spoon just until combined.  Stir in the cooked quinoa.  Preheat the waffle maker according to manufacturer’s instructions.  Make the waffles (my waffle maker uses a 1/3 c of batter at a time, and I like to use the darkest setting) and serve immediately, or keep warm on a rack set over a baking sheet in a 200 degree oven.  Serve with maple syrup, fresh fruit or a savory ragout.  I would advise against putting extra butter on these waffles.

Read Full Post »

Chili

I used to take it as dogma that chili, real chili, must contain beef—cubes of beef, not ground beef—and only beef:  no beans, no chicken, no nuthin’.  The very idea of vegetarian chili was ludicrous (and don’t get me started on that Cincinnati stuff that they serve on spaghetti).  Indeed, this is the kind of chili that’s prepared on the competitive chili circuit.  This, I believed, was the authentic chili.

But then I got to thinking:  One, I really needed to lighten up.  Two, a combination of beef and beans (or chicken and beans, or beans by themselves) in a tomato-y spicy broth is a fantastic meal, whatever it’s called.  Three, I happen to write a blog called The Militant Carnivore Cooks for his Vegetarian Wife, so I should probably be open to the idea of less meat-centric chilis.

The final straw was an article in a recent Cook’s Illustrated that discussed that “authentic” chili that is prepared on the competitive chili circuit.  In addition to being bean-free, that chili may not contain any visible traces of tomato or onion.  It consists of nothing more than beef and heaps and heaps of ground spice, added in layer after layer over several hours of stewing.

Eew.

So, I’m a convert.  I’m a born-again chili-head.  Beef, beans, chicken, turkey, mushrooms—whatever you want to use in your chili is fine by me.  (Well, OK, I draw the line at TVP.  Again, eew.)  The only ingredient that should be common to all chilis, in my opinion, is some form of chile.  (Call me crazy.)

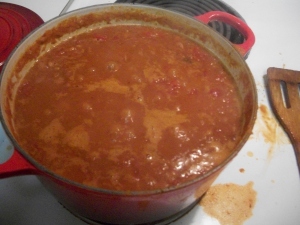
So it was that I decided to turn a batch of pinto beans into an all-bean, vegan chili.  The recipe is very similar to the Soupy Lentils from last week, but the spices give it a very different flavor profile.  I was out of dried chiles and couldn’t find chipotles en adobo at the supermarket, so I turned to the one smoked chile that I always have on hand:  pimenton.  It worked like a charm.  I couldn’t decide how to cut the onions for the chili (did I want big chunks?  thin slices?); being lazy, I went for the path of least possible work and tossed the onion in the food processor and pulsed it into a coarse puree.  A fortuitous and felicitous phenomenon resulted:  The tiny pieces of onion in the finished chili gave it a coarse texture that resembled that of ground beef.  Voila!  Vegan chili with beefy, hearty texture, and no TVP in sight.

  • 1 large onion, peeled, cut into rough 2-inch chunks
  • 2 cloves of garlic, peeled
  • 1 t cumin seeds
  • 1 T dried Mexican oregano
  • 2 T pimenton (Spanish smoked paprika)
  • 1 28-oz. can of tomatoes
  • 1 12-0z. can of PBR (or another appropriately cheap and hipster-worthy beer)
  • 4 c cooked or canned pinto beans

Heat a few tablespoons of olive oil in a large Dutch oven over medium-low heat.  Toss the onion and garlic into the food processor.   Keeping your face well back, pulse until the onion is coarsely pureed.  Add to the Dutch oven with a generous pinch of salt and saute over medium heat until soft and translucent, about 3-4 minutes. Meanwhile, pound the cumin seeds and oregano in a mortar and pestle until roughly ground; add to the onion mixture along with the pimenton and cook for about 2 minutes.

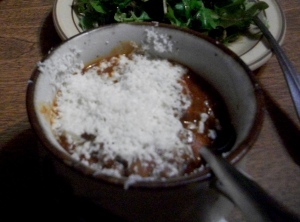
Drain the liquid from the can of tomatoes into a bowl; reserve.  Using scisscors, roughly chop the tomatoes inside the can, then stir into the onion mixture.  Turn the heat up to medium and cook, stirring frequently, for about 5 minutes.  Add the tomato juice and beer, stirring and scraping the bottom of the pan to deglaze, and cook, stirring occasionally, for about 5 minutes or until most of the alcohol has evaporated off.  Stir in the beans.  Add water to cover and stir to combine.  Simmer until the mixture comes together, about 10-20 minutes.  Taste for seasoning and spice; if desired, add a few dashes of hot sauce or cayenne pepper.  Serve with grated cotija or Monterey Jack and/or a dollop of sour cream and any other garnishes you wish (particularly chopped green onions).  Definitely add some cornbread on the side.

Read Full Post »

When you’ve had all the turkey-cranberry sandwiches and reheated mashed potatoes that you can stand, it’s time to make croquettes with the Thanksgiving leftovers.

Croquettes are essentially breaded and deep-fried anythings.  Usually, these anythings include bechamel sauce as a binder.  The key, then, to post-Thanksgiving croquettes is to make a big ol’ batch of rather thick bechamel and to mix it with any and all of the leftover Thanksgiving vegetables and/or turkey.  The recipe for the Rather Thick Bechamel:

  • 1/2 c olive oil and/or butter
  • 1/2 c flour
  • 3 c milk
  • 1 bay leaf
  • 2 cloves of garlic
  • nutmeg for grating

In a large heavy saucepan, heat the oil (and melt the butter, if using) over medium heat.  Whisk in the flour to make a roux.  Cook over medium heat, whisking frequently, to cook some of the rawness out of the flour, about 2-3 minutes.  Whisk in about 1/2 c of the milk until smooth, then whisk in the rest of the milk.  Reduce the heat to low and add the bay leaf.  Peel and smash the garlic cloves and toss them in as well.  Cook, stirring occasionally, for about 30 minutes; the bechamel should feel like thick cream.  Grate in a little nutmeg and some black pepper; add salt to taste.  Remove and discard the bay leaf and allow the bechamel to cool.  It should set up like that paste you remember eating in kindergarten.

This year, by food-processing the bechamel with an equal amount of filling, I made turkey croquettes; sweet potato and almond croquettes; and mushroom, arugula and Fontina croquettes.  (Don’t overprocess the croquette batter:  You want the filling to have some texture, hence the almonds mixed with the sweet potatoes.)  I also made potato croquettes with leftover mashed potatoes, but I didn’t add any bechamel to this:  I just stirred in an egg and a handful of flour to give the potatoes some more structure.

At this point, if you’ve gone through all of these steps, you’ve done plenty of the work for the day.  You could put the croquette batters in the fridge (or freezer) and wait until later before assembling the croquettes.  However, if you’re ready to press on…

Create a frying station like you see in the picture above.  Get out three medium mixing bowls and a large baking sheet; line the baking sheet with parchment paper.  In the first mixing bowl, add several handfuls of flour; stir in some Seasoning Salt.  In the second bowl, crack two eggs and stir them together.  In the third bowl, add a bunch of bread crumbs.  Take a spoonful of croquette batter (vegetarian croquettes first, please).  Drop the batter into the flour; toss it around to coat, and try to work it into roughly a dumpling shape.  Put the croquette in the egg and toss to coat.  Using a slotted spoon, transfer the croquette to the bread crumbs; toss to coat completely.  Place the croquette on the baking sheet.  Repeat with the remaining croquettes.

Again, at this point, you could call it a day and freeze the croquettes until tomorrow, or until next Thanksgiving.  If you’ve gone too far now to turn back, pour an inch of oil into a cast-iron skillet and place it over medium heat.  When the oil is shimmery, CAREFULLY place five or six croquettes in the oil, starting at the back of the skillet.  When they’re golden brown on the bottom, after 2-3 minutes, carefully flip the croquettes and cook on the second side, about 1-2 minutes.

Transfer to a wire rack set over a baking sheet; you can keep the croquettes warm in a 200 degree oven while you cook the rest.  Serve hot on a bed of greens with leftover cranberry sauce (preferably homemade cranberry-orange relish).

Read Full Post »

If I accomplish nothing else through this blog than encouraging a few people to try persimmons, then I will have done my small part to make the world a better place.

Persimmons have a lot going for them:  They’re photogenically attractive fruits; they offer a bright note of summery, almost citrusy sweetness in a mellow, autumnal package; they’re portable, durable and easy to eat (no messy rind to peel off, no seeds to spit out).  Since I’m obsessed with savory salads based around fruit, the discovery of persimmons and pomegranates at a recently opened nearby produce market inspired me to create this salad for a crisp October day.

I think one thing that may discourage people from buying persimmons, though, is the existence of two distinct and very different types of persimmons:  Fuyu, which can be eaten when they’re as hard as an apple (as the sticker attached to my persimmons told me), and Hichaya, which are painfully astringent at any point of ripeness shy of custardy-soft.  (This article from NPR nicely expounds on the virtues of these two fruits.)

Use Fuyus for this salad.  If you have a mandoline, you can make quick work of both the persimmons and the fennel.  The pomegranates add enough tartness to the salad that vinegar or lemon juice is unnecessary:  Just drizzle with the best extra virgin olive oil that you have and sprinkle with flaky sea salt and freshly ground pepper.

  • 4 Fuyu persimmons
  • 2 bulbs of fennel
  • 1 pomegranate
  • olive oil

Wash the persimmons; trim off and discard their ends.  Using a mandoline (or your kung fu knife skills), slice the persimmons to a 1/8-inch thickness and add to a large mixing bowl.

Wash the fennel.  Using scissors, snip off some of the fennel fronds (say, 1/4 c worth); set aside.  Cut off the stalks and reserve for the vegetable stock bag.   Trim off and discard the root end of the fennel.  Slice the fennel bulb crosswise into 1/8-inch thick slices.  Add to the persimmon slices.

Using a chef’s knife, cut the pomegranate in half.  Working over a separate mixing bowl, remove the red seeds from the yellow pith; add the seeds to the bowl and discard the pith (and any gray or rotten-looking seeds).  Add the pomegranate seeds to the persimmon and fennel.

Roughly chop the reserved fennel fronds.  Add to the persimmon, fennel and pomegranate.  Drizzle generously with olive oil and add a healthy amount of salt and pepper.  Toss to combine.  Serve.

Read Full Post »

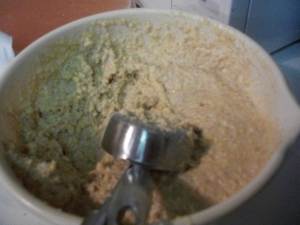
OK, I’ll be the first to admit, the picture above does not look very appetizing.  But trust me:  This batter will produce whole-grain pancakes that you won’t even think of as “whole-grain pancakes”, but as a delicious breakfast treat which beautifully complements a range of sweet and savory accompaniments so well that you’ll find yourself making these some Sunday morning instead of your traditional, white-flour pancakes.  While they are certainly great with maple syrup, their hearty corn flavor combined with the nuttiness of the quinoa lends them to a range of Southwestern and Latin American flavors.  I’d happily serve a mess of black beans over the top of them, or perhaps use them as an accompaniment for a bowl of green chili or posole.

This is one of those recipes which sounds more complicated than it actually is.  Simply substitute some cornmeal for the flour in your favorite pancake recipe and stir some cooked quinoa into the finished batter.  If you have buttermilk handy, feel free to use it instead of the milk and lemon juice.  Finally, I just happened to have the tail end of a container of almond butter in the fridge, so I stirred it into the batter (and was pleased with the results).  If you have any peanut or other nut butter (preferably just ground nuts and salt), add it in place of the almond butter, or omit the nut butter entirely.

  • 1 c flour
  • 1/2 c fine cornmeal
  • 1/2 T baking powder
  • 1/2 t baking soda
  • 1/2 t salt
  • 2 eggs
  • 2 T butter, melted (or 2 T olive oil)
  • 1 T olive oil (or 1 more T of melted butter)
  • 1 1/2 c milk
  • juice from 1/2 lemon
  • 2 T brown sugar
  • 2 T almond or other nut butter, preferably freshly ground (optional)
  • 1/2 c cooked quinoa
  • butter and/or olive oil for cooking the pancakes, as needed

Preheat a large cast iron skillet over medium-low heat.  Preheat the oven to 200 degrees, or its lowest setting.

In a large mixing bowl, whisk together the first five ingredients (i.e., the dry ingredients).  In a medium mixing bowl, stir together the eggs, butter and/or olive oil, milk, lemon juice, brown sugar and almond butter, if using.

Pour the egg mixture over the dry ingredients and stir with a spoon just until combined.  Stir in the cooked quinoa.  When the skillet is hot, add a pat of butter or a little olive oil to it.  (Butter tastes great, obviously, but burns quickly.  Olive oil is healthier and has a much higher smoke point, but it’s not, you know, butter.  I usually use a little of both for this and many other recipes.)  Ladle three pancakes into the skillet and cook until they are brown on the edges and the top is covered with bubbles, about 2 minutes.  Flip the pancakes with a spatula and finish cooking on the second side, about 30-60 seconds.  Transfer the pancakes to a rimmed baking sheet and keep warm in the oven while you finish cooking the rest of the pancakes.  Serve immediately.

Read Full Post »

It’s September already??  Where has the summer gone?

To compensate for my prolonged absence from The Militant Carnivore, let me present a recipe for some pretty darn good cornbread.  It’s adapted from a recipe on Epicurious for green onion-jalapeño cornbread, a batch of which I recently sampled at a Southern food party.  I am greatly indebted to my friend both for bringing the cornbread and for pointing me to the recipe, because this is just fantastic.

While purists may complain, cornbread is good, but cornbread with stuff in it is even better.  Not being from a cornbread-centric region of the country, I am unfettered from any traditions dictating that cornbread should be unadulterated by any “mix-ins”, or that I should use white cornmeal only, or that bacon grease is the fat of choice for true cornbread.  (I do believe, though, that a cast-iron skillet is the only appropriate vessel for making cornbread—and for making many other things, too.)  When my most recent hankering for cornbread struck, I didn’t have any green onions or jalapeños on hand (or anything else, really—I suppose I should go grocery shopping), but I did have a half-finished jar of chipotles en adobo just miring on the door of the fridge.

I’ve come late to the chipotle game.  I only recently started cooking with them and have been pleasantly surprised by how much flavor can be delivered by a pantry item.  With their bewitching combination of smoke and red pepper, chipotles offer a lot of the same pleasure as pimentón, Spanish smoked paprika.  (I should probably stop describing pimentón that way:  After all, I could just as sensibly call paprika “Hungarian unsmoked pimentón“.)  The major difference (besides the fact that chipotles are HOT!) is that pimentón peppers are, of course, ground into a powder, whereas chipotles are canned or jarred in adobo, a vinegary tomato sauce.  That means you can chop up the chipotles and incorporate them into dishes as you would fresh peppers; you can also use the adobo as an ingredient as well.

makes 8 pieces of cornbread, so serves (ahem) 4

  • 3/4 c flour
  • 3/4 c cornmeal
  • 1/4 c sugar
  • 1/2 T baking powder
  • 1 t baking soda
  • pinch of salt
  • 1/4 c (4 T) butter
  • 2 large (or 3 small) eggs
  • 1 T lemon juice and/or apple cider vinegar
  • 1 1/4 c milk
  • 1 c sharp cheddar, coarsely grated
  • 1/3 c chipotles en adobo, roughly chopped, adobo reserved for another use

Preheat the oven to 350 degrees.  Mix together the first six ingredients (those would be the dry ingredients) in a large mixing bowl.

Place a cast-iron skillet over medium-low heat.  Slowly melt the butter in the skillet, taking care not to burn it.

Add the eggs to a medium mixing bowl; stir in the lemon juice and the milk.  (You could also omit the lemon juice and substitute buttermilk for the milk.)  When the butter is melted, swirl the skillet so that the melted butter coats its sides, and then pour the butter, whisking all the while, into the egg-milk mixture.  Put the skillet back on the burner and turn the heat up to medium.

Pour the egg-milk-butter mixture over the dry ingredients; use a large spoon to combine.  Don’t overstir:  Just mix until the dry ingredients are incorporated into the liquid.  Stir in the grated cheddar and the chopped chipotles.

Pour the batter into the preheated, buttered skillet.  Turn the heat off under the skillet.

Put the skillet in the oven.  Bake for 20 minutes.  When a skewer or knife inserted into the center of the cornbread comes out clean, it’s done.

Cut into eighths and serve with a drizzle of honey, or alongside a big bowl of black beans and a few Mexican beers.

Read Full Post »

One of my favorite brunch dishes is salade lyonnaise.  Building off the theory that everything tastes better with bacon and a poached egg on top, it is one of the greatest salads around, but perhaps not one that is fit for weeknight dining, and certainly not one that is vegetarian-friendly.  Removing just the bacon for the non-meat-eaters or removing just the egg for the oophobes would throw the entire salad out of whack:  Bacon’s smoky saltiness complements the rich creaminess of eggs beautifully.  After all, bacon and eggs go together like, well, bacon and eggs.

I wanted a simpler, vegetarian salad that still highlighted the bracing bitterness of frisee with notes of smoke, salt, crunch and creaminess, all tied together with a tart vinaigrette.  Nuts were a no-brainer substitution for the crunch factor; blue cheese provided welcome creaminess and replaced some of bacon’s salt and savoriness.  To balance the blue cheese with some brighter notes, and to add the missing smoky element, my eyes turned to the bowl of cherries on the counter.  (I find myself making a lot of recipes with cherries and pecans, and that’s because they’re so damn good together.)  Ever since I got Seven Fires by the Argentine chef Francis Mallmann, I’ve been wanting to grill, sear and char everythingCooking fruit and incorporating it into savory dishes might be my new favorite culinary trick, and it works here:  The smoky charred cherries mingle beautiful with the vinaigrette and add bright treble notes to offset the bass of the blue cheese.

Best of all, it’s a much simpler salad to make than salade lyonnaise.  The pecans and cherries can be cooked in the same skillet, and that’s the only pan to wash up.  I’m not saying this will be the featured dish at a special brunch, but it can certainly be served as a quick and fast weeknight dinner, as well as a delicious side dish to heartier fare.

  • 1 head of frisee (and/or escarole)
  • 2 handfuls of pecans
  • 1 bowl of cherries (about 2 handfuls)
  • 1 clove of garlic
  • 1 T Dijon mustard
  • 1 T sherry vinegar
  • 1/2 T balsamic vinegar
  • olive oil, as needed (about 1/2 c)
  • 2 oz. excellent blue cheese (Gorgonzola, Stilton, Maytag, etc.)

Cut the root end off the frisee.  Wash and dry thoroughly.  Tear into pieces into a large mixing bowl.  Set aside.

Heat up a cast-iron skillet over medium-low heat.  Add the pecans and toast carefully, shaking the skillet occasionally, until they become fragrant, about 2 minutes.  Watch them carefully:  You don’t want burned pecans.

Add the pecans to the frisee.  Return the empty skillet to the burner and set the heat to medium-high.

Tear the cherries in halve and remove their pits and stems.  (I find it easier to tear and pit the cherries with my fingers than to cut them with a knife.)  When the skillet is good and hot, add the cherries cut side down.  Don’t touch them for a good 2 minutes:  Let them get a nice sear on them.  When they have some char on them, flip them over with a spatula and cook on the other side for 1-2 minutes.

While the cherries are cooking, make the vinaigrette:  Mash the garlic and a pinch of salt into a paste with the mortar and pestle, then stir in the mustard and the vinegars.  (I’m just about over balsamic vinegar, but here it adds a little sweetness that rounds out the dressing and bridges the cherries with the blue cheese.)  Whisk in enough olive oil to form a creamy vinaigrette.

When the cherries are ready, add them to the frisee and pecans.  Add the vinaigrette and toss the salad.  Crumble in half of the blue cheese and toss the salad thoroughly.  Transfer the salad to a serving dish, making sure some of the pecans and cherries end up on top of the salad, then crumble on the remaining blue cheese.  Serve.

Read Full Post »

A great picnic salad, especially pretty if you use red quinoa.  Now that asparagus season has passed, you could try this with green beans or zucchini instead.  Go ahead and toss in a little chèvre, if you’re so inclined.

makes enough quinoa salad for 2 or 3 picnics, or for a week of light lunches, mid-afternoon grazing and midnight snacks

  • 1 c red quinoa, thoroughly rinsed (quinoa must be rinsed to remove its coating of saponin, which is not something you want to eat)
  • 1 bunch pencil-thin asparagus, washed, ends trimmed (and reserved for vegetable stock)
  • 2 cloves of garlic, peeled
  • 1/2 t coriander seeds
  • 1 T Dijon mustard
  • 1 orange
  • olive oil, as needed (at least 1/2 c)
  • 2 handfuls of pecans

Preheat the oven to 350 degrees.

If you have a large pot with a steamer that sits at the top, then you can cook the quinoa and the asparagus in the same pot:  Fill the pot halfway with water, making sure that it doesn’t come up to the level of the steamer.   Put the pot over high heat and bring to a boil.  Stir in a large pinch of salt and the quinoa; reduce the heat to medium-low so that the quinoa cooks at a gentle simmer.

Put the steamer basket over the simmering water and put the asparagus inside.  (If the asparagus is too long, snap it in half.)  Cover the pot and steam the asparagus until bright green and just tender, 3-5 minutes.  (Err on the side of undercooking the asparagus:  It needs some snap to have some textural contrast with the quinoa, and besides, mushy asparagus is yucky.)  Set up an ice bath (a lot of cold water and ice cubes in a large bowl).  When the asparagus is done, immediately transfer it to the ice bath and completely submerge it to stop the cooking.   Let it cool for a few minutes, then drain thoroughly.

Meanwhile, with a mortar and pestle, start mashing up the garlic cloves with a pinch of salt.  Once the cloves are in smaller pieces, add the coriander seeds and mash them into the garlic.  (The garlic will keep the coriander seeds from flying around like miniature BBs.)  Once the garlic and coriander are pureed, stir in the mustard.  Juice the orange and stir the orange juice into the garlic-mustard mixture.  Transfer this to a mixing bowl and slowly whisk in the olive oil until a creamy vinaigrette (well, citronette) is formed.

When the quinoa is done (you should see a well-developed spiral in the middle of each quinoa grain, and most of the water should be absorbed), drain the quinoa in a fine sieve or colander.  Transfer to a large mixing bowl.

Now we’ve got the asparagus, the dressing and the quinoa:  The only thing left is the pecans.  Place them on a rimmed baking sheet, crushing them lightly as you do.  Bake for about 5 minutes, stirring occasionally, just to warm them up; they should start to smell toasty and incredible.  (Be careful, though:  Nuts go from toasted to burnt very quickly, and burning does nothing good for their flavor.)

Chop the asparagus into 2-inch lengths and add to the quinoa.  Add the nuts to the quinoa and stir to combine.  Add enough of the dressing to coat the salad and stir to combine thoroughly.

If you wanted to add some crumbled goat cheese or feta, or perhaps a few chopped herbs (dill?), this would be the time to do it.  Try to refrain from eating the salad immediately:  It definitely benefits from an hour or so in the fridge.  Serve a dozen of your closest friends at a springtime picnic, or enjoy having a ready-made delicious and nutritious meal in the fridge for a week.

Read Full Post »

When late summer rolls around, one can never have enough recipes for corn, tomatoes or zucchini.  This is a nice versatile recipe:  Either make the dish ahead so you can serve it later as a room temperature (or chilled) salad, or serve it warm as a side dish.  While this vegetable medley is phenomenal with produce fresh from the farm, the sauteing and the herbs guarantee that it will be delicious even when made in the middle of winter with lackluster vegetables.

  • a couple of sage leaves, or a sprig of rosemary or thyme
  • 1 clove of garlic, peeled
  • 2 medium zucchini, ends removed, cut into 1/2 inch dice
  • 2 ears of corn, shucked, silk removed
  • 4 Roma tomatoes
  • 1/2 lime
  • 2 avocados

In a large skillet, heat a couple glugs of olive oil over medium heat.  Add the sage leaves and the garlic.  When the oil is hot, add the zucchini and a generous pinch of salt.  Saute over medium heat, stirring occasionally.

Holding the corn upright over a bowl, cut the kernels off the cobs (reserve the cobs for vegetable stock).  When the zucchini starts to brown, add the corn kernels to the skillet.  Saute over medium heat, stirring occasionally, for about 5 more minutes.

Chop the tomatoes into 1/2-inch dice.  Add half of the tomato to the skillet and saute over medium heat until the tomatoes are juicy, about 3-4 minutes.  Squeeze the lime juice into the skillet, stir to combine, and remove from the heat.

Transfer the vegetables to a large mixing bowl.  Add the reserved tomato.  Dice the avocado and add to the bowl.  Mix to combine and check for seasoning, adding salt and pepper to taste.  Serve warm, or refrigerate until later.  (You can also chop and add some fresh herbs to the salad:  basil, tarragon, dill, fennel fronds…)

Read Full Post »

Older Posts »